The iPhone’s Built-in Photo Editor: A Limited but Useful Tool
The iPhone’s built-in photo editor is a powerful tool that allows users to edit and enhance their photos. While it may not have all the features of a dedicated photo editing app, it is still a useful tool for making quick edits and adjustments to photos.
Basic Editing Tools
The iPhone’s built-in photo editor includes a range of basic editing tools, including:
These tools are easy to use and can make a big impact on the overall look and feel of a photo.
Advanced Editing Tools
While the basic editing tools are useful, the iPhone’s built-in photo editor also includes some advanced features that can help users take their photos to the next level. These include:
These advanced features can help users to create more complex and nuanced edits, and can be especially useful for professional photographers.
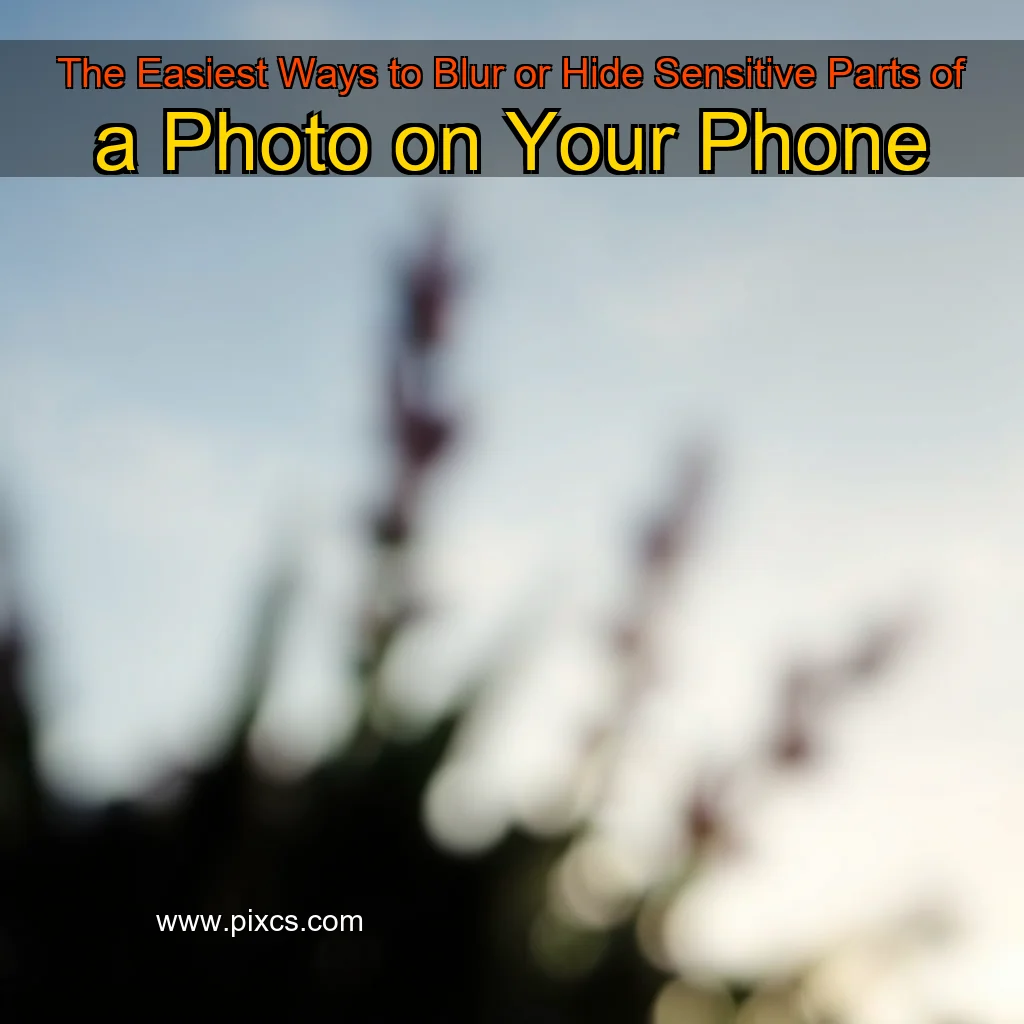
Hiding Sensitive Parts of a Photo
One of the limitations of the iPhone’s built-in photo editor is that it does not include a blur tool. However, users can still hide sensitive parts of a photo using the Markup tool.
Editing with the Markup Tool
The Markup tool is a powerful feature in the Photos app that allows you to edit your photos with precision and control. With this tool, you can draw over sensitive parts of the photo, add text, and even use the camera to capture a new photo to replace the edited part.
Key Features of the Markup Tool
How to Use the Markup Tool
To use the Markup tool, follow these steps:
Tips and Tricks
Here’s how to do it:
Concealing Sensitive Areas with the Pen Tool
To conceal sensitive areas in your photos, follow these steps:
Getting Started with the Blur Tool
To access the blur tool in Samsung’s Gallery app, follow these steps:
Blur unwanted elements from your images with Canva’s powerful blur tool.
The blur tool allows users to blur specific areas of an image, creating a unique and creative effect. This feature is particularly useful for photographers who want to remove unwanted objects or distractions from their images.
Introduction
Canva is a popular graphic design platform that has gained widespread recognition for its ease of use and versatility. With its user-friendly interface and wide range of features, Canva has become an essential tool for individuals and businesses looking to create professional-looking graphics, social media posts, and presentations.
Key Features of Canva
The Blur Tool
The blur tool is one of Canva’s most useful features, allowing users to blur specific areas of an image. For example, a photographer may want to blur a distracting background or remove a person from the scene. The blur tool can also be used to create a sense of depth or atmosphere in an image.
How to Use the Blur Tool
To use the blur tool in Canva, users simply need to select the area they want to blur and adjust the blur level to their liking.
However, using a photo editing app can provide more control over the process.
Introduction
The world of digital photography has undergone significant transformations in recent years, with advancements in technology and software making it easier for photographers to edit and enhance their images. One of the most popular and widely used photo editing software is Adobe Photoshop, which has been a benchmark for professional photographers for decades. However, with the rise of mobile devices and social media, photographers are now more accessible than ever, and the need for user-friendly and intuitive editing tools has become increasingly important.
The Rise of Mobile Editing
In recent years, mobile devices have become an essential tool for photographers, allowing them to capture and edit images on the go. With the introduction of mobile apps like VSCO, Snapseed, and Lightroom, photographers can now edit and enhance their images using their smartphones.
news is a contributor at Pixcs. We are committed to providing well-researched, accurate, and valuable content to our readers.